> ## Documentation Index
> Fetch the complete documentation index at: https://docs.hoagie.io/llms.txt
> Use this file to discover all available pages before exploring further.
# Development Workflow
> Learn about the development workflow for Hoagie!
## Step 1: Linear Task
Head to Linear and check the tasks that have been assigned to you. Toggle
the status to "In Progress" once you have began working on it.
 ## Step 2: Create a feature branch
Toggle over to the preview branch by running:
```bash zsh theme={null}
git switch preview
```
Make sure preview is up-to-date by running:
```bash zsh theme={null}
git pull
```
Then, create your own feature branch by running:
```bash zsh theme={null}
git checkout -b
```
You will then be on your own feature branch and can make commits.
## Step 3: Make code changes
Make code changes necessary for your tasks on your own feature
branch. Remember to commit often for each relevant code portion
with meaningful commit messages!
## Step 4: Push your changes
Once you have tested your changes and ensured that they are functional,
merge changes from preview into your local branch by running:
```bash zsh theme={null}
git merge origin/preview
```
There may be merge conflicts at this point if the files that you have been
working on has been modified. You will then need to resolve these merge
conflicts and make sure that both your changes and the incoming changes
are there.
Then, you can push your changes from your local branch by running:
```bash zsh theme={null}
git push origin
```
## Step 5: Create a Pull Request (PR)
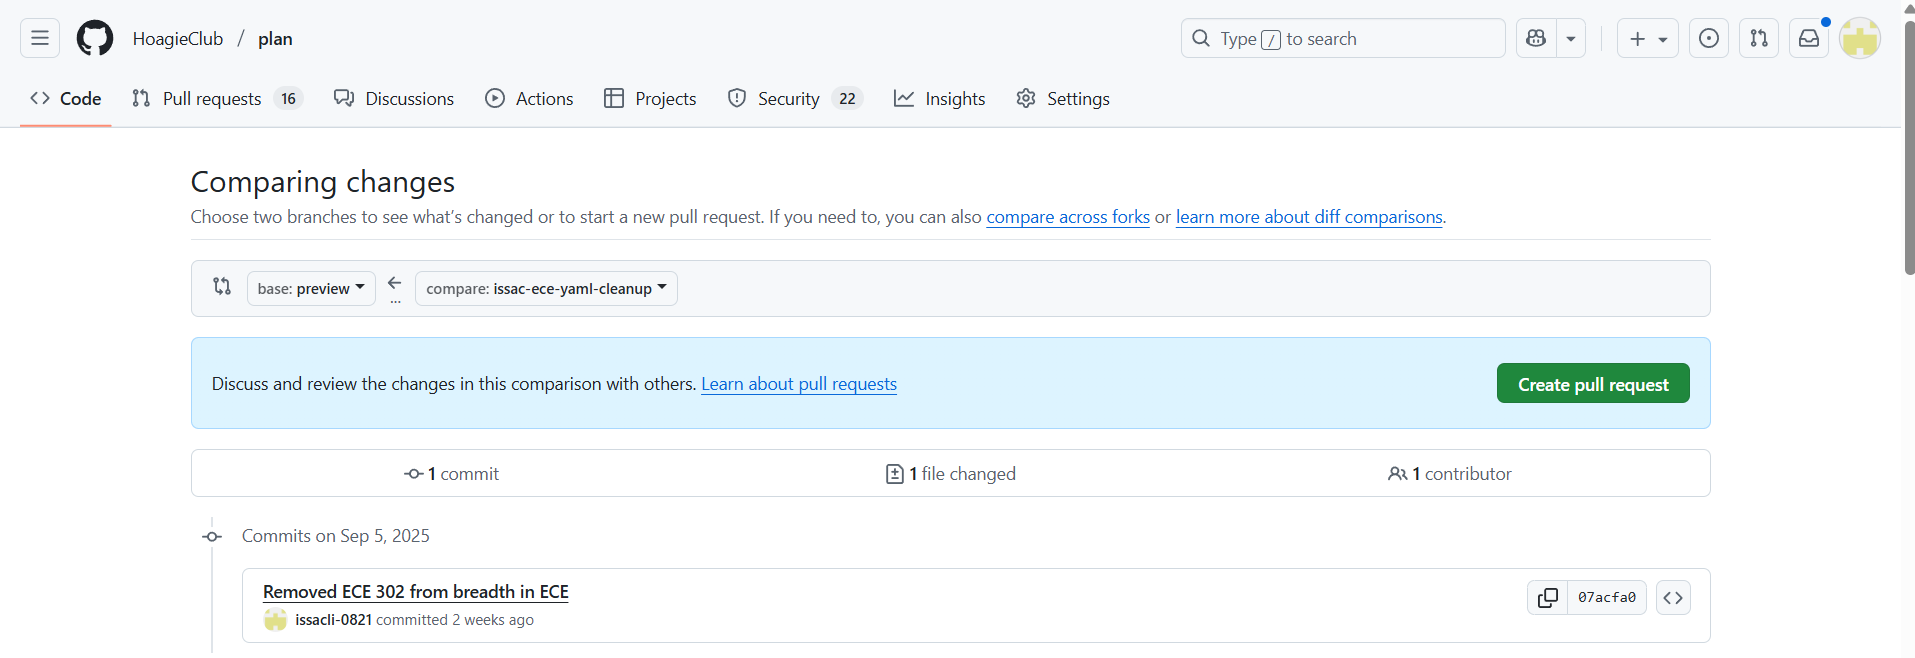
Go to "Pull requests" and click "New pull request". Then, create a pull
request from your feature branch to preview. Specifically, preview should
be the base, and your feature branch should be the compare. Below is an
example:
## Step 2: Create a feature branch
Toggle over to the preview branch by running:
```bash zsh theme={null}
git switch preview
```
Make sure preview is up-to-date by running:
```bash zsh theme={null}
git pull
```
Then, create your own feature branch by running:
```bash zsh theme={null}
git checkout -b
```
You will then be on your own feature branch and can make commits.
## Step 3: Make code changes
Make code changes necessary for your tasks on your own feature
branch. Remember to commit often for each relevant code portion
with meaningful commit messages!
## Step 4: Push your changes
Once you have tested your changes and ensured that they are functional,
merge changes from preview into your local branch by running:
```bash zsh theme={null}
git merge origin/preview
```
There may be merge conflicts at this point if the files that you have been
working on has been modified. You will then need to resolve these merge
conflicts and make sure that both your changes and the incoming changes
are there.
Then, you can push your changes from your local branch by running:
```bash zsh theme={null}
git push origin
```
## Step 5: Create a Pull Request (PR)
Go to "Pull requests" and click "New pull request". Then, create a pull
request from your feature branch to preview. Specifically, preview should
be the base, and your feature branch should be the compare. Below is an
example:
 ## Step 6: Request for Review
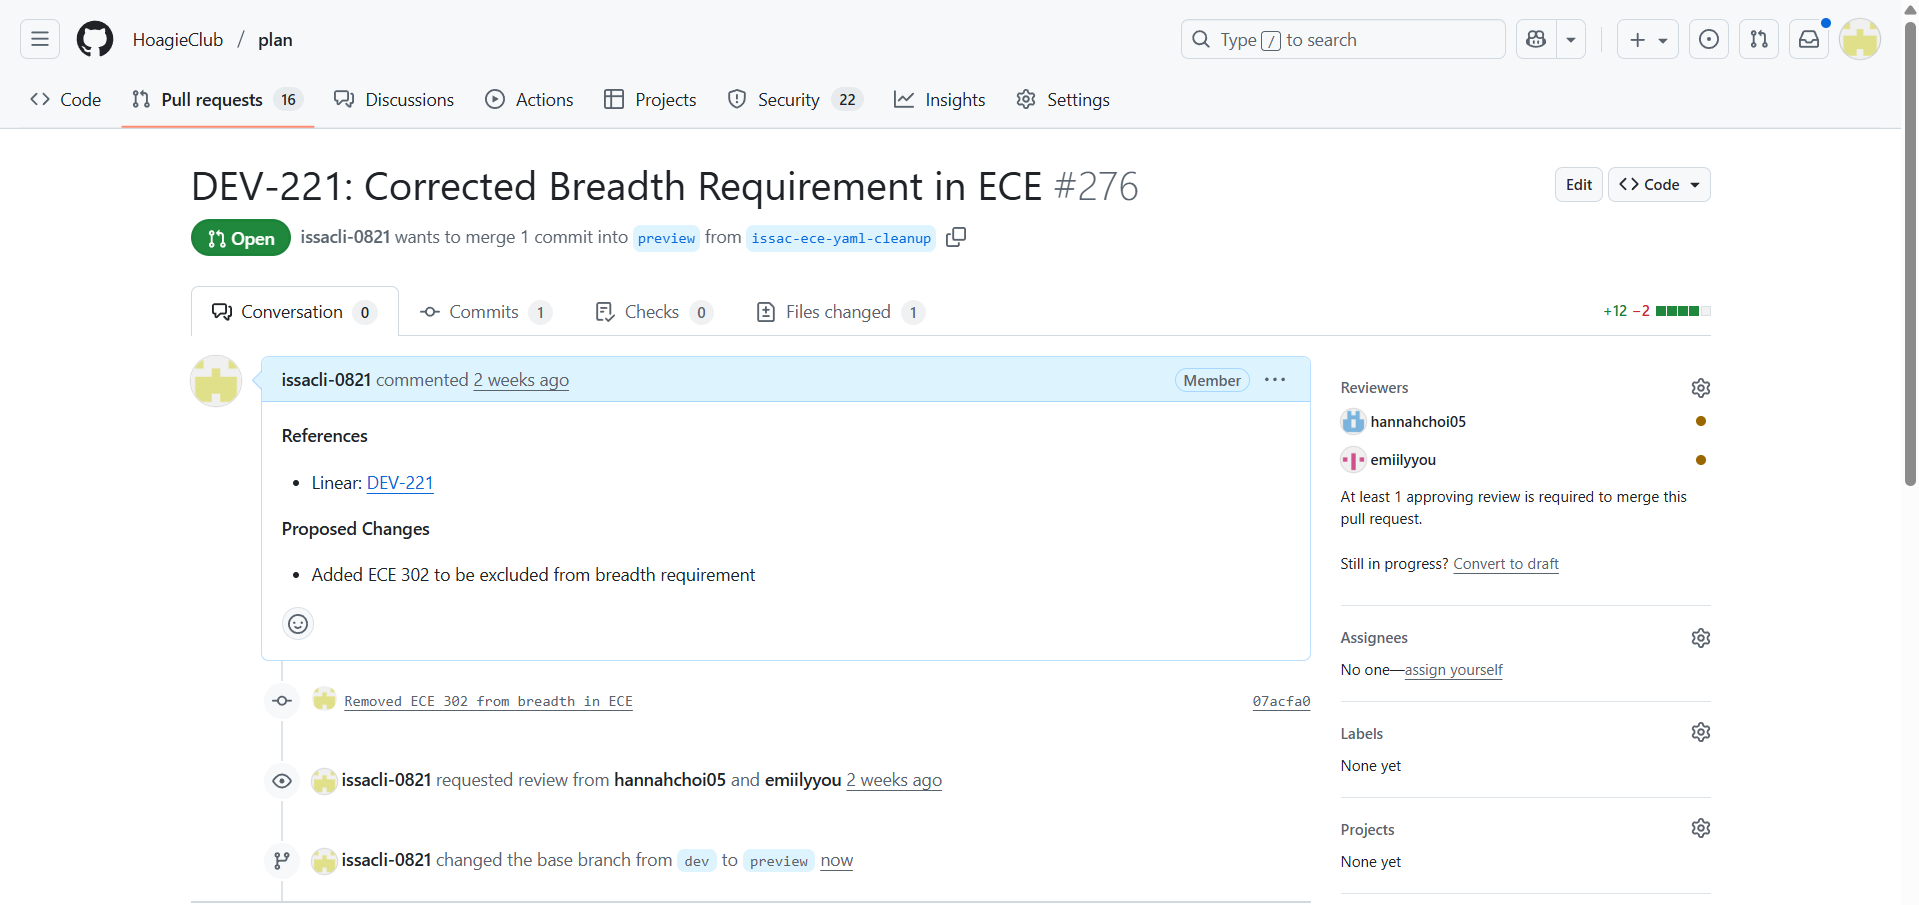
Once you have created your PR, tag your team leads as reviewers, and
send a message in your Slack subteam channel to ask for another team member
to review your PR. Team members should look out for these messages, and add
themselves as a reviewer. Also, be sure to change the status of the Linear
task to "In Review".
## Step 6: Request for Review
Once you have created your PR, tag your team leads as reviewers, and
send a message in your Slack subteam channel to ask for another team member
to review your PR. Team members should look out for these messages, and add
themselves as a reviewer. Also, be sure to change the status of the Linear
task to "In Review".
 ## Step 7: Address comments
After reviewing your PR, reviewers may leave feedbacks about your PR. You
may need to commit and push further changes before the PR is approved.
## Step 8: Merge the PR into preview
Once the PR has been approved, a team lead will do a "squash and merge" on
the PR. Then, the status of the Linear task should be updated to Done.
## Step 9: Merge to main
For a new release, team leads will make a PR from preview into main. This
will be done with "Create a merge commit".
## Step 7: Address comments
After reviewing your PR, reviewers may leave feedbacks about your PR. You
may need to commit and push further changes before the PR is approved.
## Step 8: Merge the PR into preview
Once the PR has been approved, a team lead will do a "squash and merge" on
the PR. Then, the status of the Linear task should be updated to Done.
## Step 9: Merge to main
For a new release, team leads will make a PR from preview into main. This
will be done with "Create a merge commit".